Python
第三方库大全
https://juejin.cn/post/6978275187749830663#heading-55
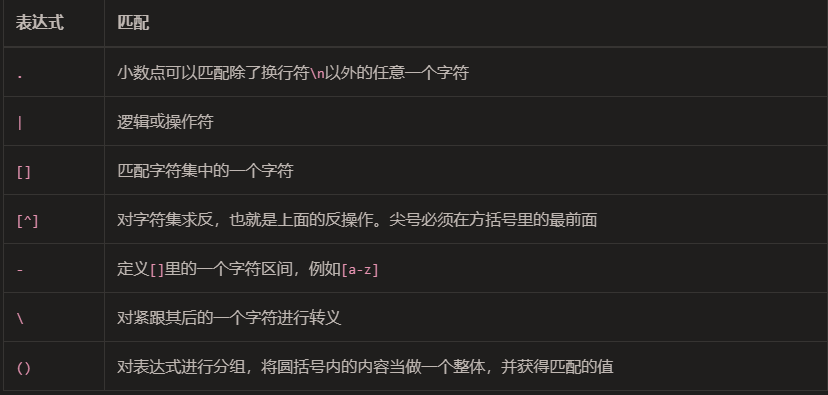
re
https://www.liujiangblog.com/course/python/72
https://www.liujiangblog.com/course/python/73
PyQT
so eazy
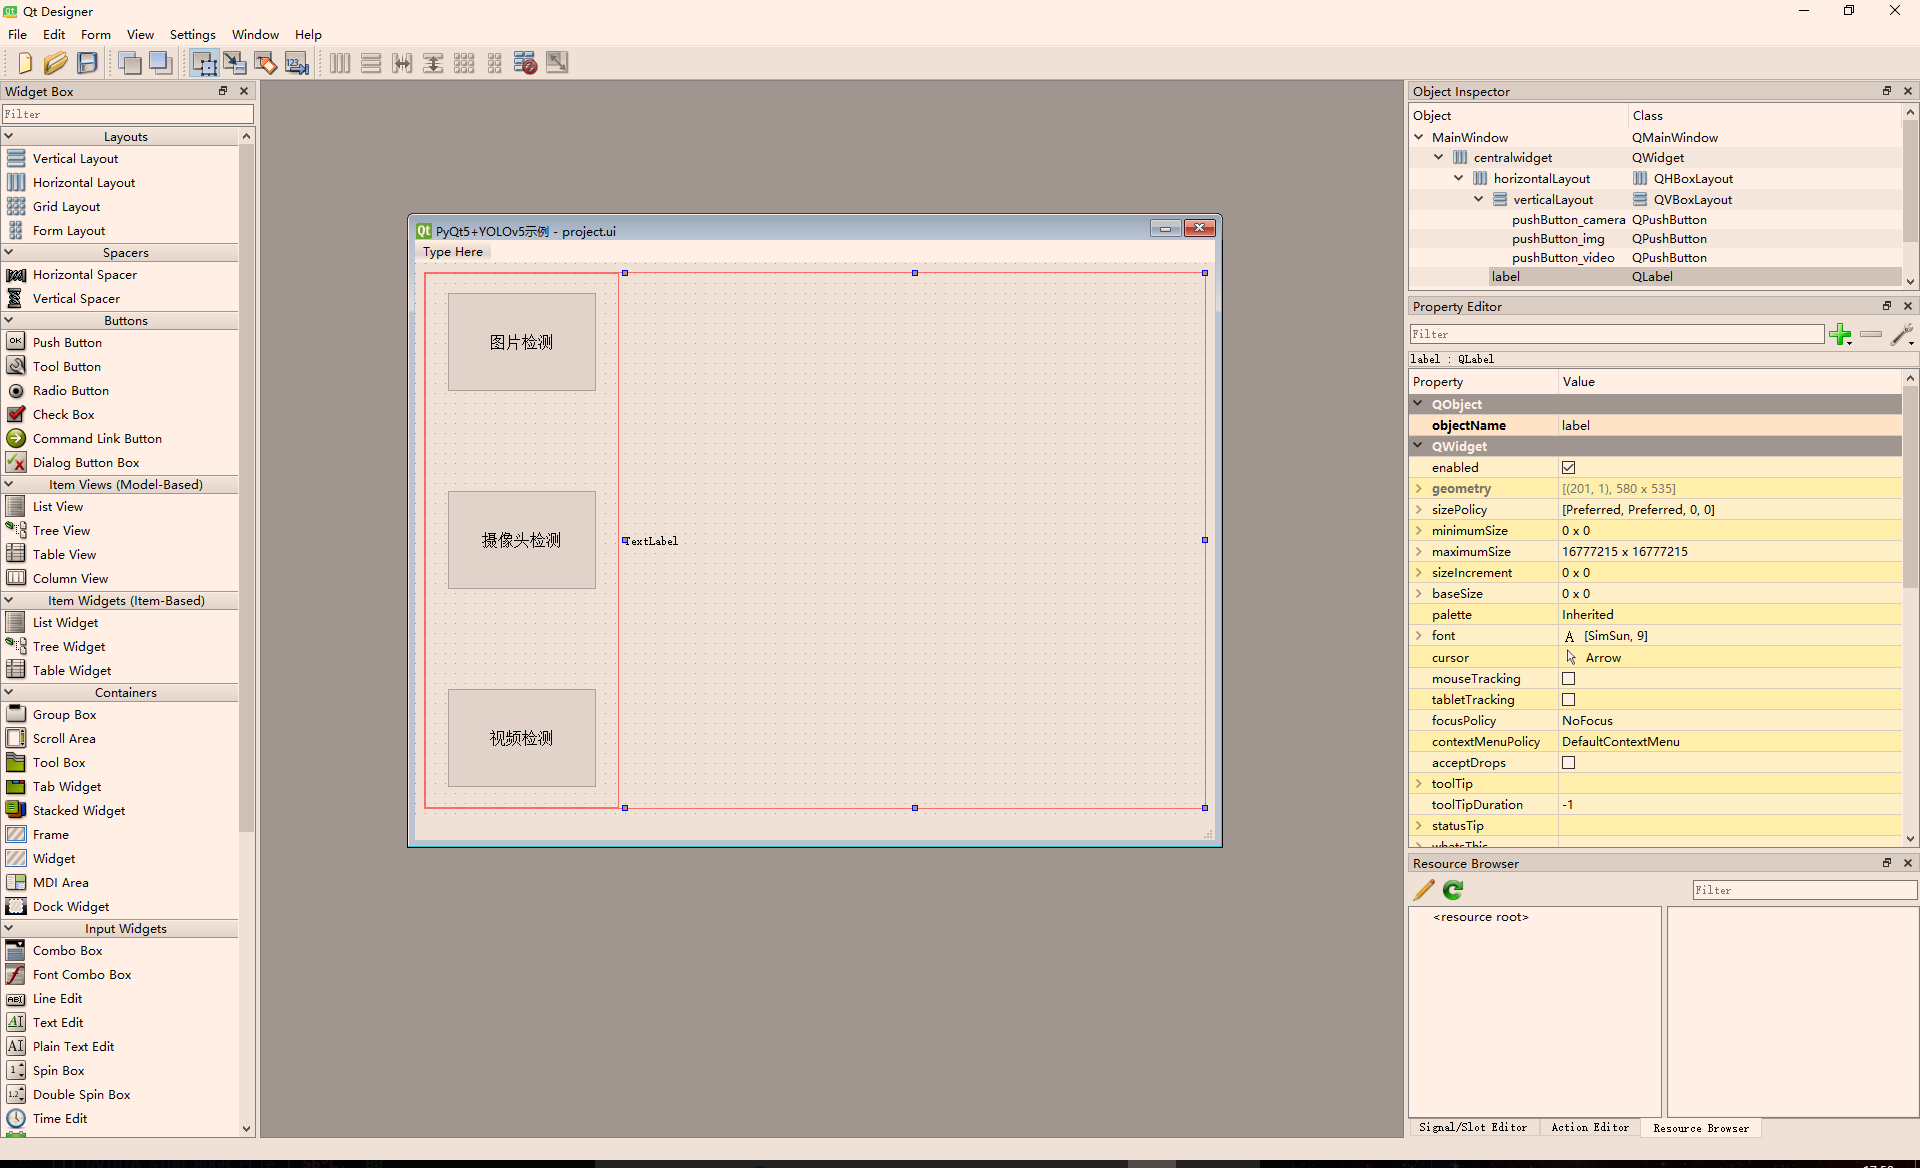
1 用QtDesigner通过拖拽即可设计UI界面,然后保存为.ui格式
2 用pyuic5将*.ui转化为*.py文件    pyuic5 -o project.py project.ui
3 根据*.py文件中retranslateUi中的button调用connect相应的action即可
4 自己补充数据 模型等加载即可

self.pushButton_img.clicked.connect(self.button_image_open)
self.pushButton_video.clicked.connect(self.button_video_open)
self.pushButton_camera.clicked.connect(self.button_camera_open)
self.timer_video.timeout.connect(self.show_video_frame)

class Ui_MainWindow(QtWidgets.QMainWindow):
    def __init__(self, parent=None):

if __name__ == '__main__':
    app = QtWidgets.QApplication(sys.argv)
    ui = Ui_MainWindow()
    ui.show()
    sys.exit(app.exec_())
https://zhuanlan.zhihu.com/p/498120306
Qt Designer Download
https://build-system.fman.io/qt-designer-download
生成.ui文件(拖拽生成UI)

tutorial
https://maicss.gitbook.io/pyqt-chinese-tutoral/
https://build-system.fman.io/manual/
PyUIC主要是把Qt Designer生成的.ui文件换成.py文件。
python封装exe
https://blog.csdn.net/dopamy_busymonkey/article/details/106398497
pip install pyinstaller
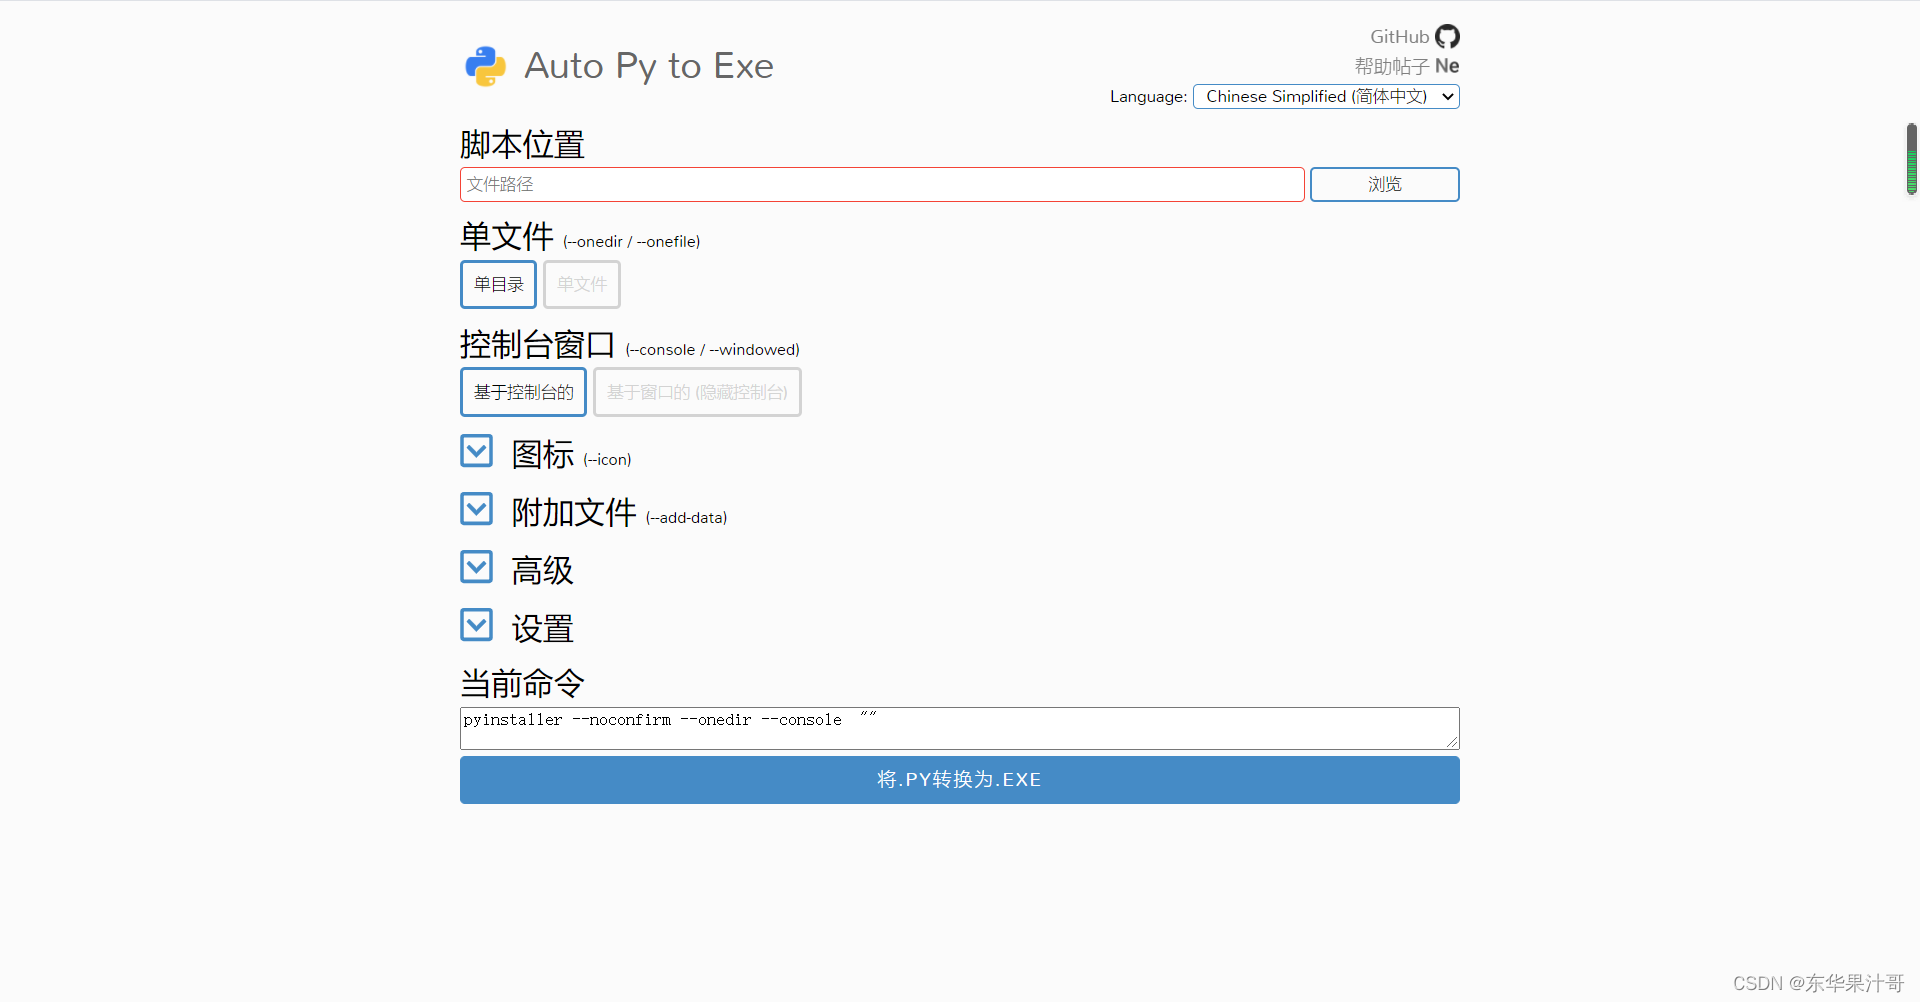
pyinstaller -F py2exe_demo.pyauto-py-to-exe 是一个用于将Python程序打包成可执行文件的图形化工具。
https://blog.csdn.net/u013421629/article/details/121742410
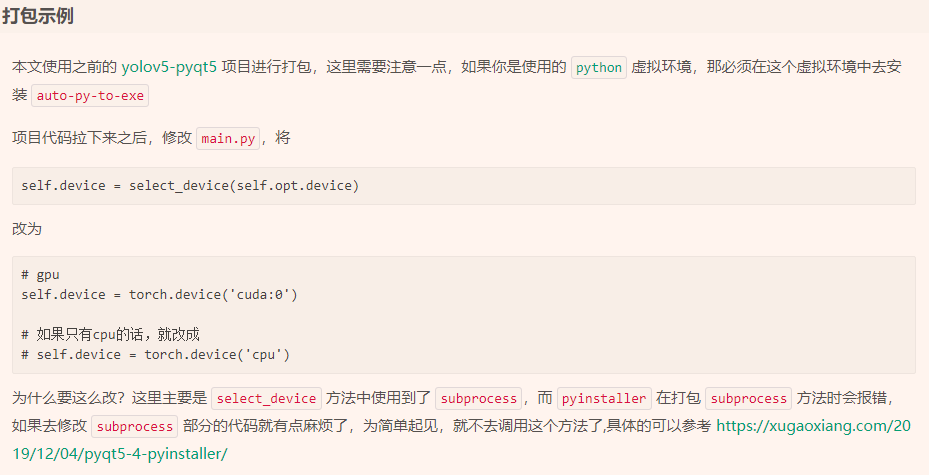
https://github.com/apodxx/yolov5-pyqt
https://xugaoxiang.com/2021/10/13/yolov5-to-exe/
Pyinstaller
https://xugaoxiang.com/2021/10/13/yolov5-to-exe/
https://github.com/xugaoxiang/yolov5-pyqt5
打包体积压缩
https://www.codetds.com/article/12204091
主要是创新需要的虚拟环境,太大是因为把不必要的包附带了
软件授权系统及注册机

软件许可License文件生成
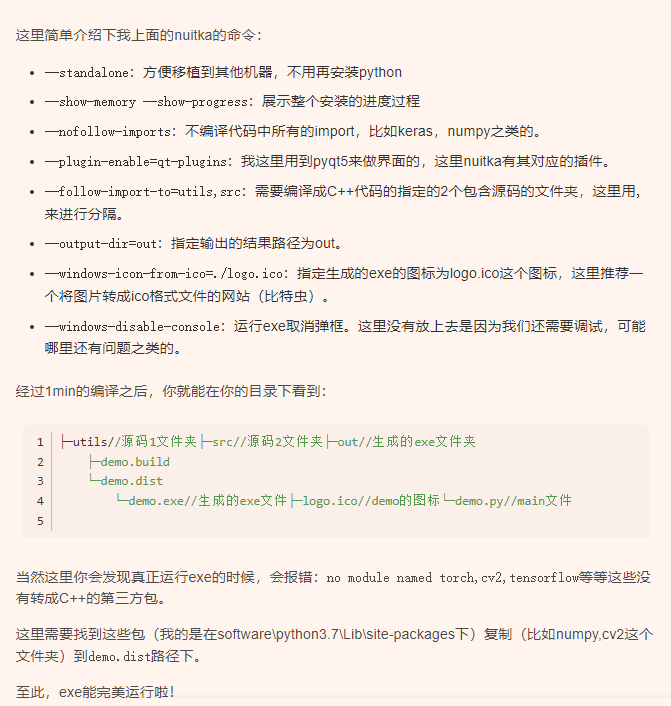
Nuikta
–mingw64 默认为已经安装的vs2017去编译,否则就按指定的比如mingw(官方建议)
–standalone 独立环境,这是必须的(否则拷给别人无法使用)
–windows-disable-console 没有CMD控制窗口
–output-dir=out 生成exe到out文件夹下面去
–show-progress 显示编译的进度,很直观
–show-memory 显示内存的占用
–include-qt-plugins=sensible,styles 打包后PyQt的样式就不会变了
–plugin-enable=qt-plugins 需要加载的PyQt插件
–plugin-enable=tk-inter 打包tkinter模块的刚需
–plugin-enable=numpy 打包numpy,pandas,matplotlib模块的刚需
–plugin-enable=torch 打包pytorch的刚需
–plugin-enable=tensorflow 打包tensorflow的刚需
–windows-icon-from-ico=你的.ico 软件的图标
–windows-company-name=Windows下软件公司信息
–windows-product-name=Windows下软件名称
–windows-file-version=Windows下软件的信息
–windows-product-version=Windows下软件的产品信息
–windows-file-description=Windows下软件的作用描述
–windows-uac-admin=Windows下用户可以使用管理员权限来安装
–linux-onefile-icon=Linux下的图标位置
–onefile 像pyinstaller一样打包成单个exe文件(2021年我会再出教程来解释)
–include-package=复制比如numpy,PyQt5 这些带文件夹的叫包或者轮子
–include-module=复制比如when.py 这些以.py结尾的叫模块
–show-memory 显示内存
–show-progress 显示编译过程
–follow-imports 全部编译
–nofollow-imports 不选,第三方包都不编译
–follow-stdlib 仅选择标准库
–follow-import-to=MODULE/PACKAGE 仅选择指定模块/包编译
–nofollow-import-to=MODULE/PACKAGE 选择指定模块/包不进行编译
https://www.nuitka.net/zh_CN/doc/user-manual.html
https://zhuanlan.zhihu.com/p/341099225
https://zhuanlan.zhihu.com/p/353577753
pip install nuitka
python -m nuitka ${nuitka_cmds}

python -m nuitka --standalone --mingw64 --show-memory --show-progress --enable-plugin=pyqt5 --follow-import-to=pyqt5 --static-libpython=no  --output-dir=output_exe main.py
# --standalone 暗含了 –-follow-import
Windows下最终打包成一个.exe文件,Linux下打包成Linux执行档。

《Nuitka打包教程》所有命令
https://blog.csdn.net/qq_38830593/article/details/123092470
example
https://juejin.cn/post/7019616774366691336
Python可执行文件反编译教程(exe转py)
https://www.jb51.net/article/231188.htm
rpa文件解包_py封装exe
https://cloud.tencent.com/developer/article/2064420
python并行编程
import concurrent.futures
import time
number_list = [1, 2, 3, 4, 5, 6, 7, 8, 9, 10]

def evaluate_item(x):
        # 计算总和,这里只是为了消耗时间
        result_item = count(x)
        # 打印输入和输出结果
        return result_item

def  count(number) :
        for i in range(0, 10000000):
                i=i+1
        return i * number

if __name__ == "__main__":
        # 顺序执行
        start_time = time.time()
        for item in number_list:
                print(evaluate_item(item))
        print("Sequential execution in " + str(time.time() - start_time), "seconds")
        # 线程池执行
        start_time_1 = time.time()
        with concurrent.futures.ThreadPoolExecutor(max_workers=5) as executor:
                futures = [executor.submit(evaluate_item, item) for item in number_list]
                for future in concurrent.futures.as_completed(futures):
                        print(future.result())
        print ("Thread pool execution in " + str(time.time() - start_time_1), "seconds")
        # 进程池
        start_time_2 = time.time()
        with concurrent.futures.ProcessPoolExecutor(max_workers=5) as executor:
                futures = [executor.submit(evaluate_item, item) for item in number_list]
                for future in concurrent.futures.as_completed(futures):
                        print(future.result())
        print ("Process pool execution in " + str(time.time() - start_time_2), "seconds")
moviepy module 保存为gif或者video格式
def make_gif(images, fname, fps=1, duration=1):
  '''
    images: list image is RGB not BGR, cv2.cvtColor(img0, cv2.COLOR_BGR2RGB)
  '''
  import moviepy.editor as mpy
  def make_frame(t):
    try:
      x = images[int(len(images)/duration*t)]
    except:
      x = images[-1]

    return x.astype(np.uint8)

  clip = mpy.VideoClip(make_frame, duration=duration)
  clip.write_gif(fname, fps)

make_gif(images, fname='./res.gif', fps=1,  duration=len(images))
FastAPI
部署在web端,感觉比flask好, Flask, FastApi 部署Ai model
https://www.qixinbo.info/2022/05/08/fastapi/
https://fastapi.tiangolo.com/zh/
用Docker打包FastAPI程序 https://www.qixinbo.info/2022/07/05/fastapi_in_docker/
Config.yaml
https://hydra.cc/docs/tutorials/basic/your_first_app/config_groups/
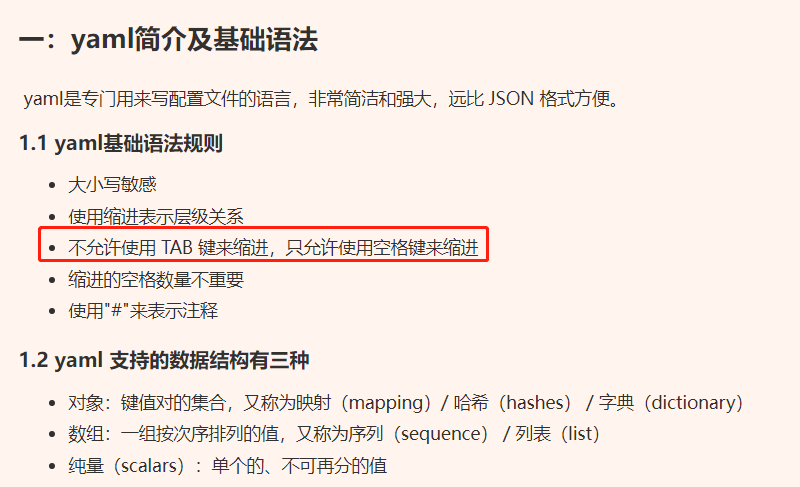
YAML
https://www.cnblogs.com/hhaostudy/p/16104098.html
key: value dict 冒号后空格
- list
转换为python对象包含dict list等, 然后就是索引了
读 写
使用yaml.dump()或者yaml.safe_dump()方法,加入allow_unicode=True参数防止写入的中文乱码
 pip install pyyaml

def read_yaml_data():
    with open(file_path, 'r', encoding='utf-8') as f:
    data = yaml.load(f, Loader=yaml.FullLoader)
    print(f'读取的数据:{data}')
    print(f'数据类型为:{type(data)}')

def write_yaml_data():
    data = {'hash': {'name': 'Steve', 'foo': '公寓'}}

    file_path = os.path.abspath(os.path.join(os.path.dirname(__file__), 'test.yml'))
    with open(file_path, 'w', encoding='utf-8') as f:
        yaml.safe_dump(data, f, allow_unicode=True)
类型:
1 训练时候路径、模型参数等配置文件cfg.yaml
2 argparse配置文件opt.yaml
3 超参数配置文件hpy.yaml
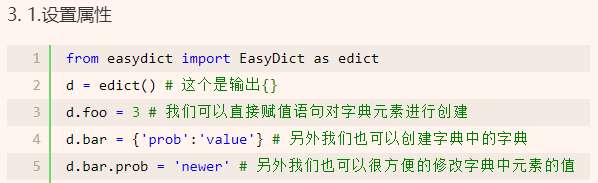
eazydict
以属性的方式去访问字典的值
https://pypi.org/project/easydict/1.2/


Tensorflow
TF内存自增长
# 获取所有可用GPU
gpus = tf.config.experimental.list_physical_devices('GPU')
# 将对应GPU设置为内存自增长
tf.config.experimental.set_memory_growth(gpus[0], True)
def set_GPU():
"""GPU相关设置"""
# 打印变量在那个设备上
# tf.debugging.set_log_device_placement(True)
# 获取物理GPU个数
gpus = tf.config.experimental.list_physical_devices('GPU')
print('物理GPU个数为:', len(gpus))
# 设置内存自增长
for gpu in gpus:
tf.config.experimental.set_memory_growth(gpu, True)
print('-------------已设置完GPU内存自增长--------------')
# 获取逻辑GPU个数
logical_gpus = tf.config.experimental.list_logical_devices('GPU')
print('逻辑GPU个数为:', len(logical_gpus))tensorboard
https://tensorboard.dev/ 可以上传log进行多个实验监控
Pytorch
timm
预训练库 以CV的分类任务为主 https://www.qixinbo.info/2022/06/25/timm/
https://zhuanlan.zhihu.com/p/377060514
Model Summaries - Pytorch Image Models
Results - Pytorch Image Models
https://github.com/rwightman/pytorch-image-models
Deployment
gradio
底层是fastAPI,是一个webApp展示demo的好工具
tutoral link: https://gradio.app/ & https://huggingface.co/docs/hub/spaces-config-reference
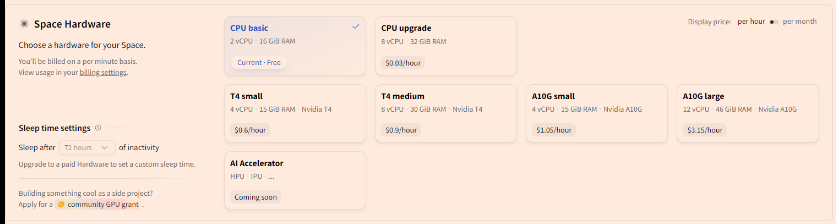
1 model or datasets to save.
2 space to show app demo.
links: https://huggingface.co/spaces/lee-jet/demo
免费的cpu,12G